|
BMW motorcycle tire removal and rim ding repair |
|
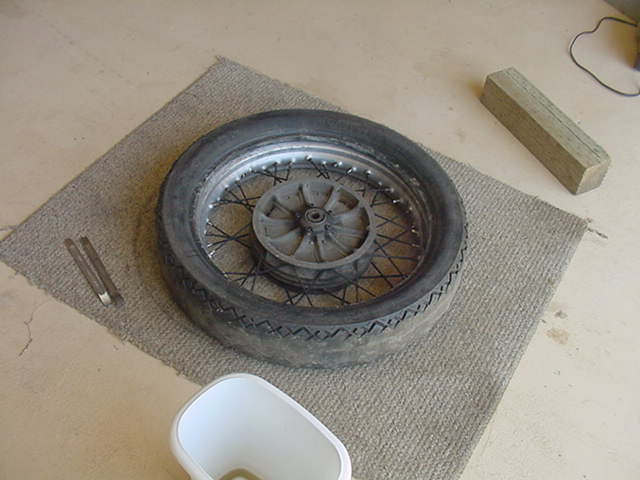
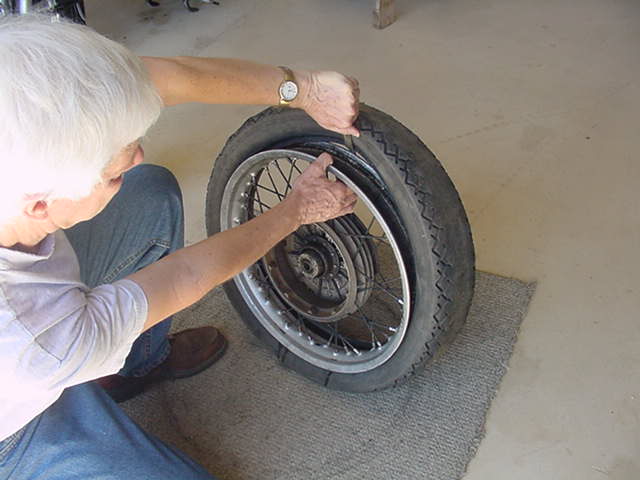
I like to find a clean place to work and a piece of carpet for a soft working surface. This helps protect the rim. I cleaned up the rim to make the job a bit less unpleasant. It was really dirty and that is my "first" alarm signal.
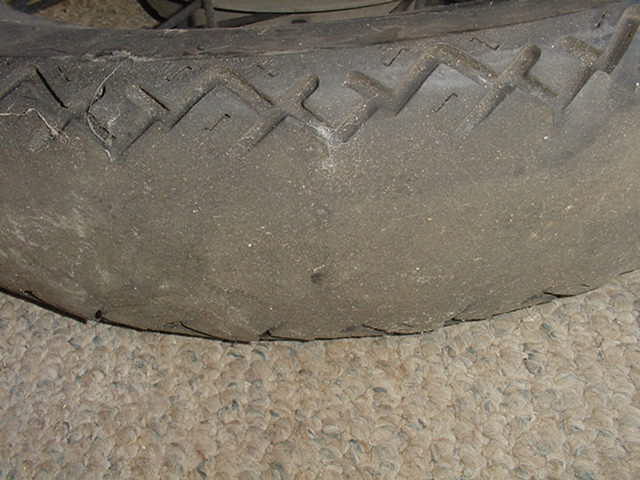
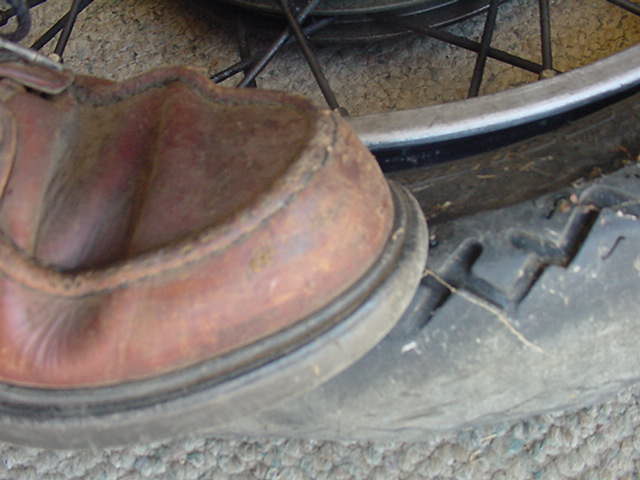
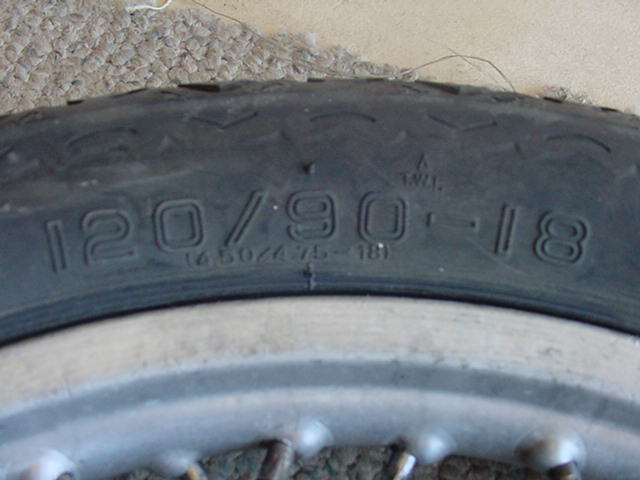
Inspection shows that this tire was ridden way too far. It is nearly down to cords. "Second" alarm signal.
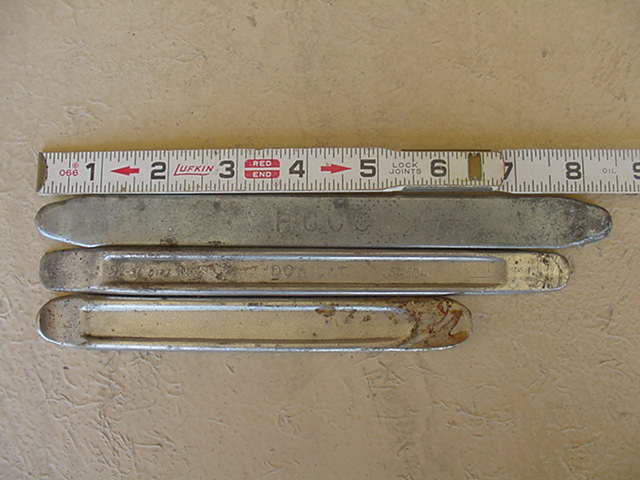
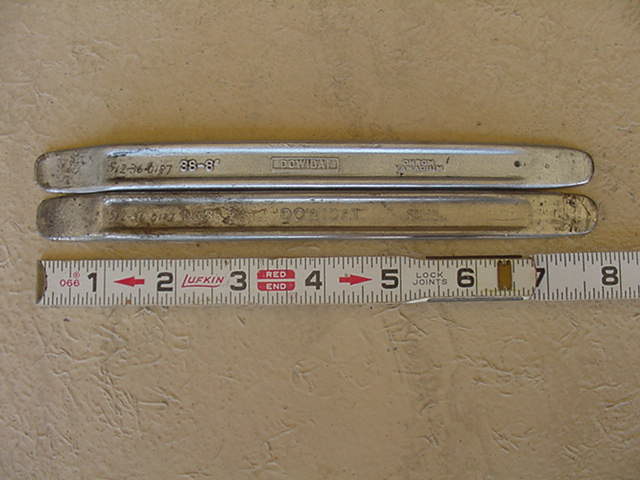
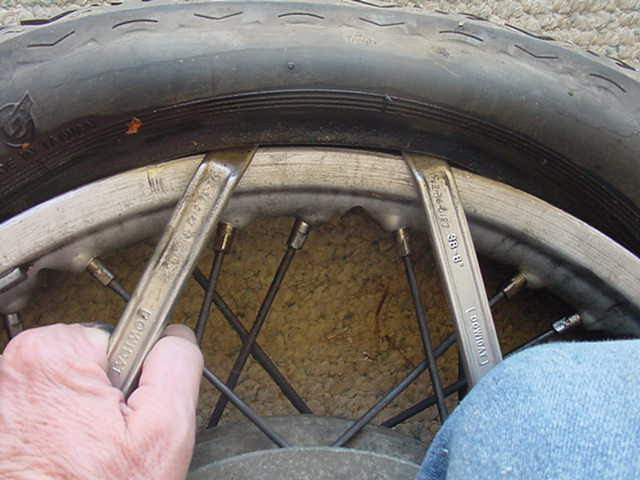
Some examples of tire irons. The top one was made in the USA and is longer, but fatter and thicker. I don't like them. The middle is a Dowidat model 38-8 and I love them. They are thin and strong. The lower one is out of the BMW tool kit. They will work, but are short and not really as thin as the Dowidat. Besides being shorter, the BMW tire iron has rounded sides that will eat up your rim. They will make large dents in an alloy rim and even slightly dent and "break" the chrome on a steel rim. Find better irons. Do not use a screwdriver unless there is no other way. The square edges will eat up the rim, chew up the bead and punch a hole in the tube. Plan ahead and have decent tire irons in your tool kit. I am not showing the use of rim protectors, as this rim is already too far gone to worry about. The irons will slightly mar the edge of the rim, but not nearly like the damage that is already there. I will show them for installing a tire.
My favorite tire irons don't match, as I have had them "walk away" more than once and I just reorder. I hope that they are still available. If someone has good info on tire irons, please submit it and I will do some slight research and add it in here. You will get credit/blame.
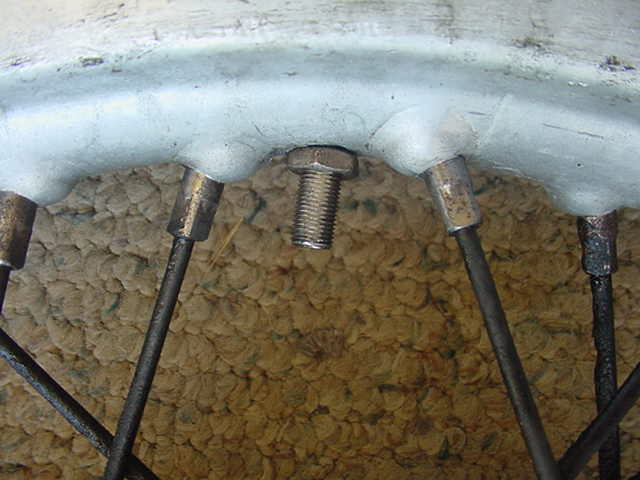
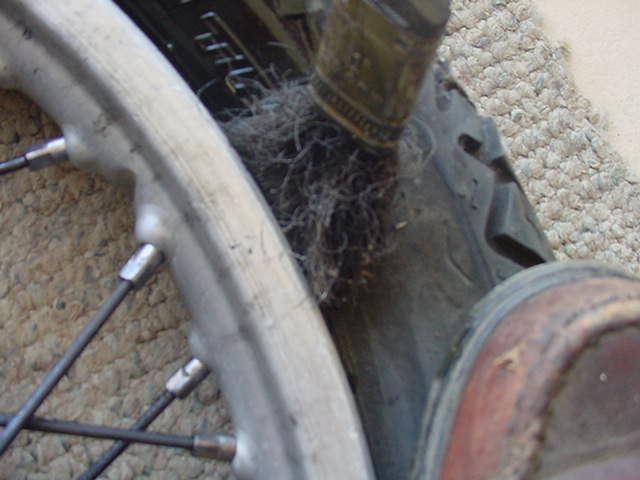
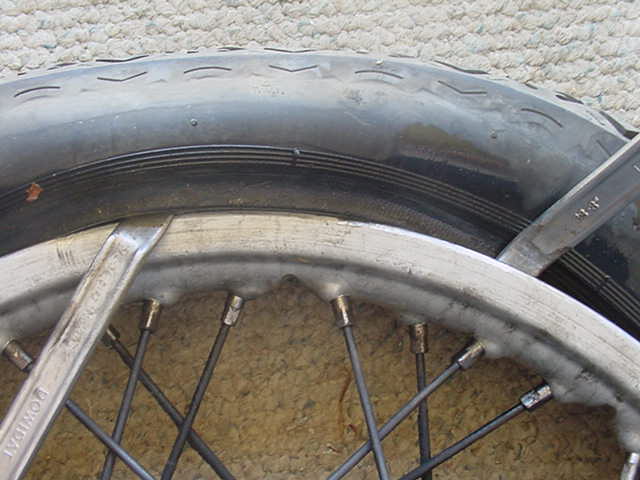
This photo shows the valve stem to be crooked. This tells me that the tire and tube may have been mounted up incorrectly, or that the raging power of the R90/6 spun the tire on the rim. Not likely. This is the "third" alarm signal.
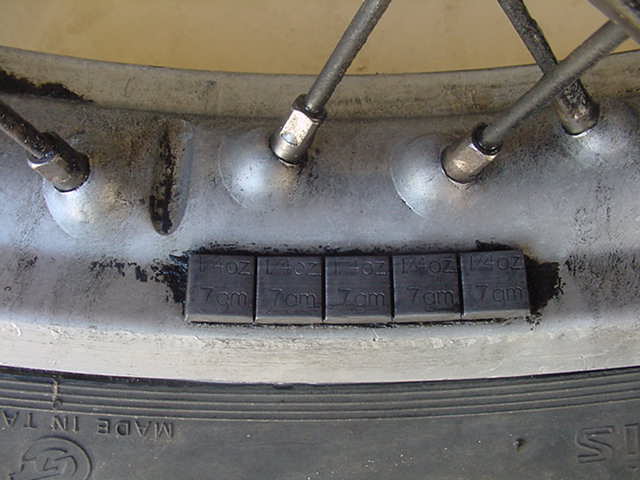
The wheel weights are all mounted on one side. They should be split up with as close to equal weight on each side. It is possible that it needed this much weight to balance, but not likely. More likely that the installer didn't know what he was doing. See my page on balancing a wheel. This is the "fourth" alarm signal. They are adding up fast.
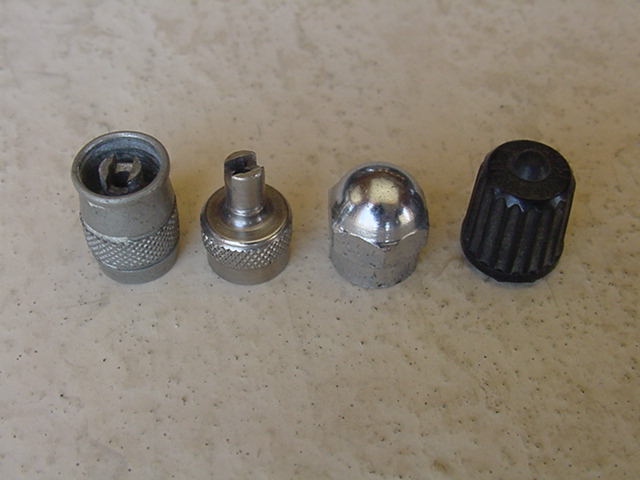
Time to remove the valve core to get the air out. This shows some of the various valve stem caps. The purpose of the cap is to seal the air. If the valve core seals the air, that is great, but don't expect it. The cap is your first line of defense. From L. to R; Original cap from a Metzler tube. This one has the special wrench and is very good. Next is some aftermarket cap that also has the wrench for the core. Next is some fancy chromed cap that may look great, but isn't practical because it has no wrench. You now have to carry one in your tool kit. The one on the right is off of some "other brand" of tube and is plastic. I have had them strip threads and fail to seal. Avoid junk like this. This tube had no cap. This is the "fifth" alarm signal.
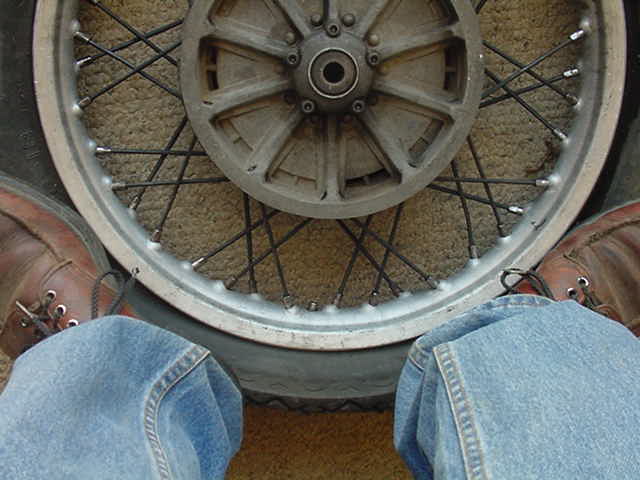
The air is out and it is time to break the bead. Some are very easy and some are impossible to do this way. I just use my feet to break it off. I have had to have help and tilt the bike over a bit and slide the tire under the center stand. Then use the weight of the bike, with mine, to put a lot of pressure in one small place to break the bead. Once it starts, just walk it around and the rest is fairly easy.
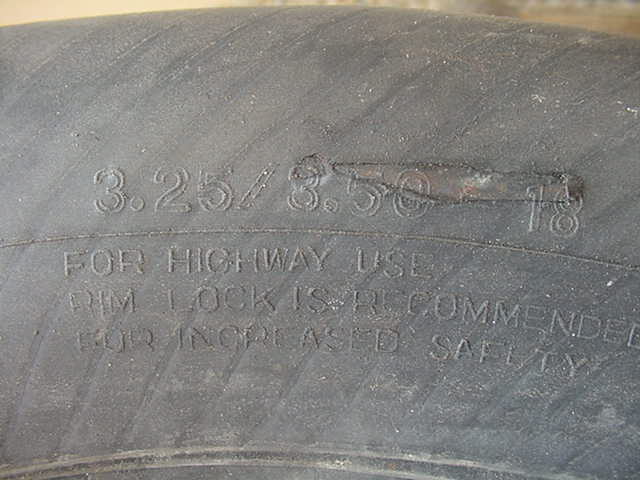
Another NO NO, the tire is oversize. This would be about a 4.50 X 18 and BMW recommends a 4.00 X 18. I highly recommend using the 4.00 tire. (Most /2 use a 3.50 on the front and rear) You will keep neutral steering. It will fit in place easily. Your speedo isn't accurate anyway, so don't worry about that aspect. The /6 isn't nearly as far off as the /5 speedo. This is just one more item that makes me highly suspicious about the previous owner and mechanic. Alarm signal six.
I use a paint brush to goop up the sidewall that I want to come over the rim. I am currently out of the really good stuff, so I use a mixture (50/50) of hand soap and water. Better stuff is available and for the beginner I strongly suggest buying real tire lube. It can be purchased at any auto store cheaply. The more of a beginner you are, the longer it will take to get this job done. Just make sure that you keep the bead slippery wet. It is easy to have it dry out and give you trouble. In an emergency, I have had to pull a fuel line and use gas.
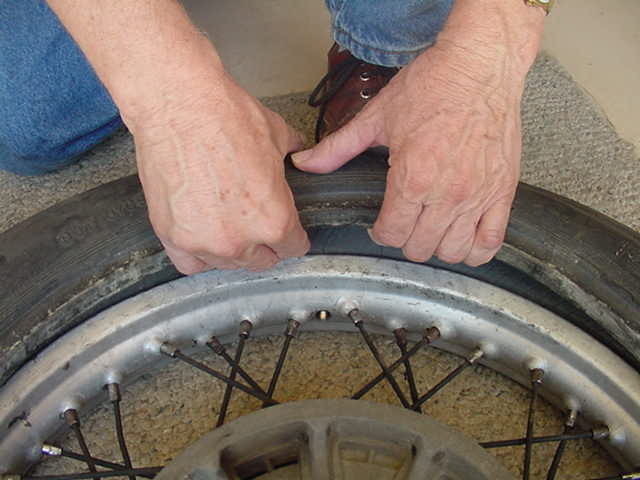
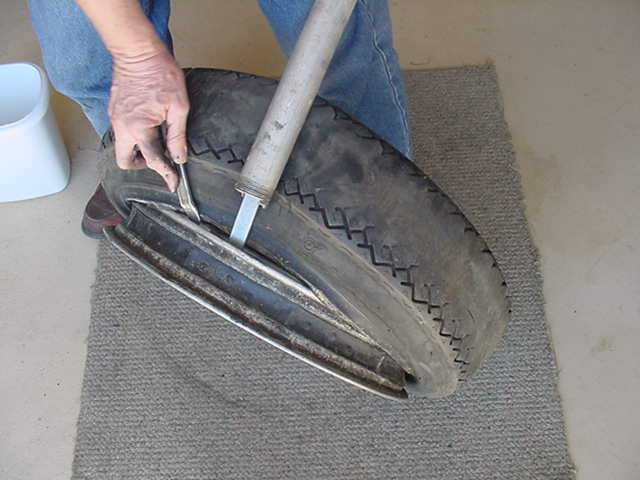
This photo is taken looking straight down. Now comes the balancing act. I have removed the nut that was on the valve stem and shoved it down and into the tire as much as possible. If it really doesn't want to go in, that means that the tire was mounted with the "valve stem patch" under the bead. Each manufacturer uses a valve stem mounted on a thick piece of rubber. That is cast into the tube and you can feel that it is thicker there. The tire would be crooked on the rim. That isn't uncommon to find. In this case the stem shoved into the tire cavity easily. I use my weight on each side of the valve stem. This is very important. See my page on the 5 dents. The bead is now in the center space of the rim. This allows the tire to shift over a bit to give maximum slack to get the tire off of the other side. It is very important to always start the bead coming off directly opposite the valve stem. This small advantage of less than 1/4" is the difference between being able to do it and failing. I actually had one customer not know this part and he had to use a cheater bar on the tire iron and he broke the bead on a brand new tire. He claimed the tire was defective......nada.
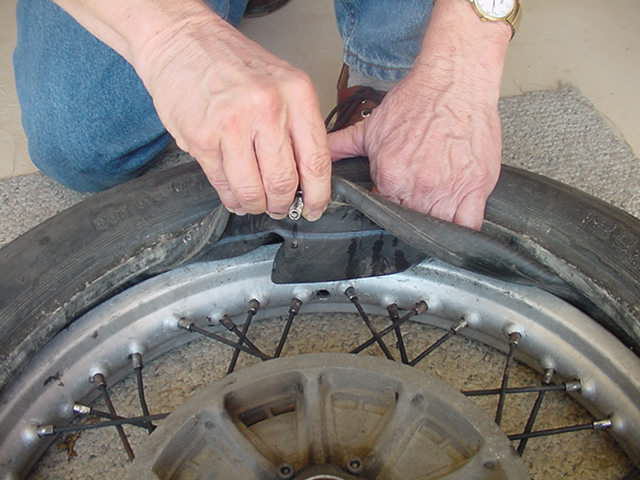
The tire irons are stuck under the bead and levered backwards and over the rim. This first "bite" is the hardest one. There is a very small risk of pinching the tube while doing this. One will usually be replacing the tube anyway, so it matters none. I like to reuse a good tube. I judge by its feel and stretching ability. I can only do that because I have removed hundreds of them and know when they "feel good" or "wimpy." Yes, yes, I know that the manufacturers suggest that you always install a new tube, but is it really necessary? That is up to you, but I never found a downside to reusing a good tube. Maybe they want to sell new tubes.
I have removed the right iron and moved it over about 2" and slid it back in. If you try to move it too far to the right, you won't be able to get the tire iron in. There is a "sweet place" to stick the iron in again. You may need to experiment to find it. One can sort of see where the empty space is for the iron to go in.
At this point, I have levered the right one over and moved the left one over a bit, same as above. I like to alternate so as to keep working directly opposite the stem.
The stem is still crooked, even after the bead is off on one side. I really want to check the tube for a wrinkle.
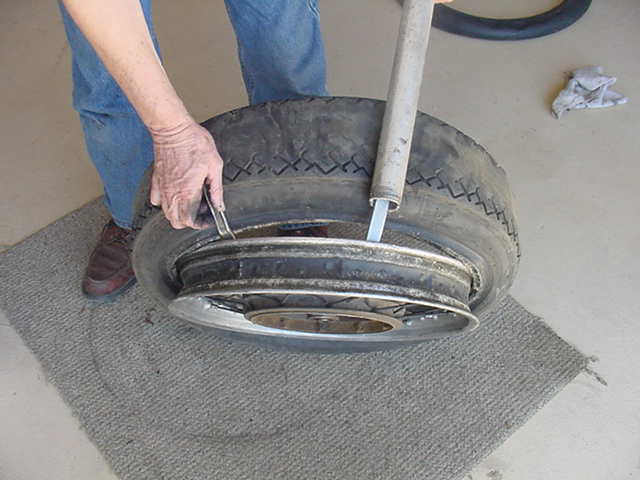
I lift up the free side of the tire and sneak my hands in to grab the tube and pull it out.
The tube is partially out. Keep working it around the rim and it will come free.
This is more proof of poor workmanship. The tube is too small for the correct sized tire. Alarm signal seven. It is way too small for this oversized tire. The brand is Cheng Shin, a cheap tube with more plastic than rubber. This is alarm signal eight, but a minor one. Besides economy, the advantage of this tube is availability and it holds air well. The main disadvantage is that they can rip open easily and allow a sudden loss of air. We call that a blow out. The natural rubber inner tubes are more likely to not rip and allow the air to escape slowly. They cost more, are harder to find and lose 1-2 lbs of air weekly. If you just once have this sudden loss of air while on a crowded freeway, you may well elect to find and pay for the natural rubber tubes. Both Metzler and Continental are natural rubber. In the case of an emergency on the road, it is better to use a tube that is too small rather than one that is too large. I imagine that this tube was in there since the tire was installed. When I find this many errors, I know that an idiot was involved somewhere. I had to use a tube that was too large once and it got me home, but was folded up in the tire. The fold will weaken the tube and eventually fail. I was stuck in the hills of Arkansas and more than 100 miles from any motorcycle shop. It was out of a Ford tractor front wheel. Do what you have to do, but fix it as soon as possible.
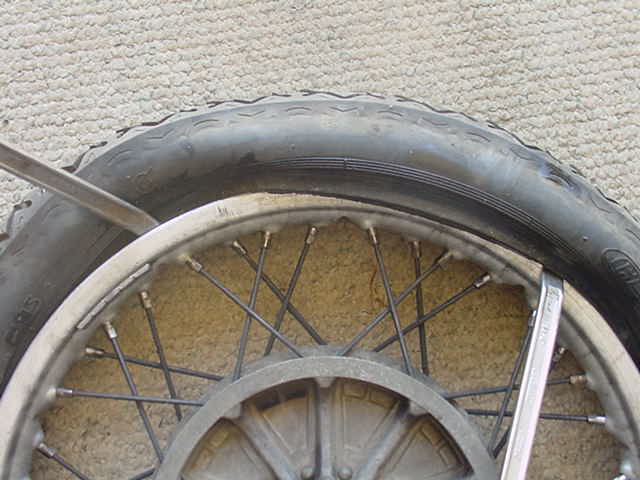
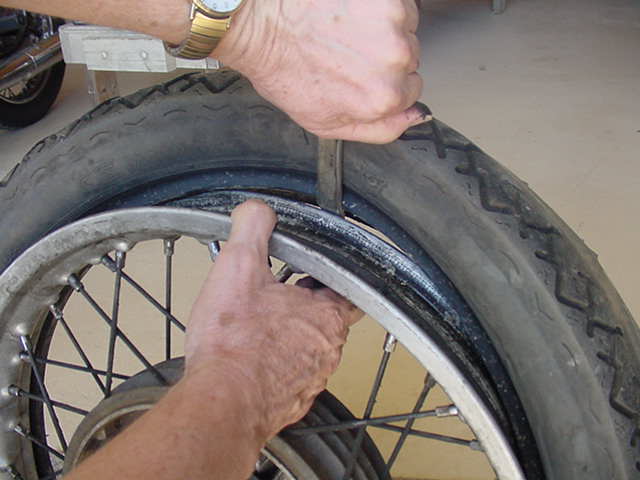
Now it is time to get the last bead off. Again, work on the opposite side of the valve stem, as this gives you the most slack. Stick a tire iron in and lever it over.
Whoa, not as easy as I thought it should be.
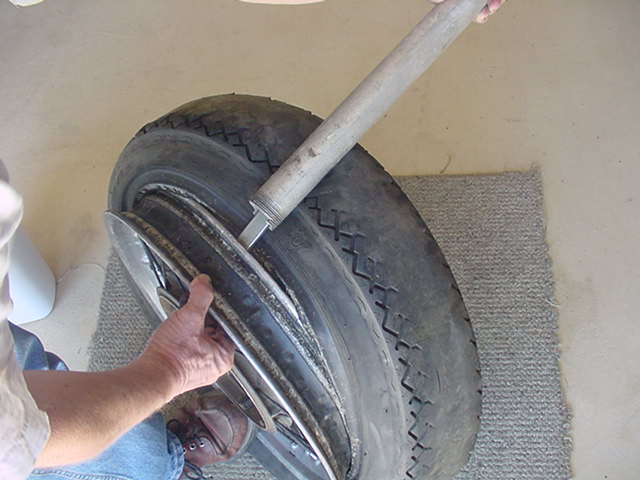
I had to slide a pipe over the tire iron to get the leverage needed to lever it over. Either the tire is much stronger than what I was used to, or I am that much weaker in my old age. Probably a bit of each. I have no idea what to suggest you use when on the road and you have to replace a tire. Oh yes, pay somebody else to do it.
Stick the other iron in as far away as possible and lever it over.
Keep working the irons farther apart. This one is about to come off. BMW motorcycle wheel with a disc, or double disc brake.Laying the wheel down on the disc will cause it to warp. You will then need to get another disc. Best is to remove the disc during the work. One can lay the wheel on an old tire to hold up the rim. This will allow the disc to be on the bottom but in the air when working on that side of the wheel. If you have two discs, then it is nearly required to remove the discs as they are in the way of the tire irons. It is an easy job to do. Be sure to properly tighten up the bolts and nuts. More tire mounting errorsYesterday I had occasion to dismount two tires from rims. One had been perfectly mounted and all was found OK. The other was a disaster waiting to happen. This is to show you more alarm signs. One should consider taking anything apart as an "autopsy" and use the information as a teaching experience. This will tell you how well the previous tire installer did. It may have been you. Best to learn from mistakes or you'll keep repeating them.
Once the valve stem nut was backed off a bit, it allowed the stem to show the alignment. It is bad. This tells me that something is wrong with the mounting of the tube. This is why one never tightens up the nut. Keep the nut loose as an indicator of conditions.
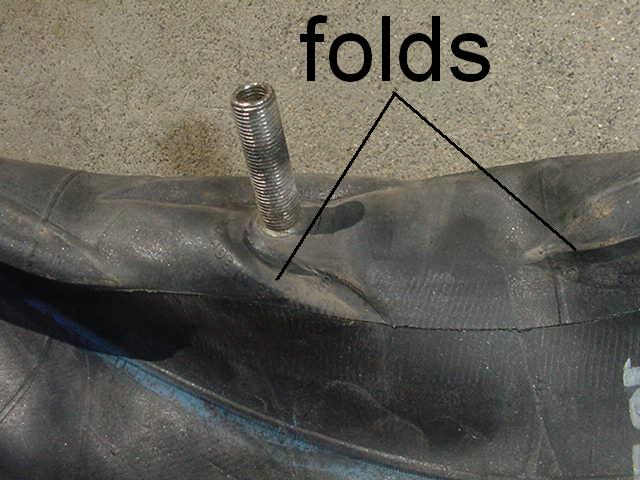
This shows the wrinkle at the stem and another on the right. This is a failure waiting to happen.
Another fold in the center of the picture.
I have never seen this one before. The tube did not take on the shape of a donut. See the very curved part? It was folded up in the tire in that fashion. This is really asking for trouble.
This is a front tire and the size is shown just as an example. While the size is about correct, it is still a cheap off brand tire. This is not the way to save money.
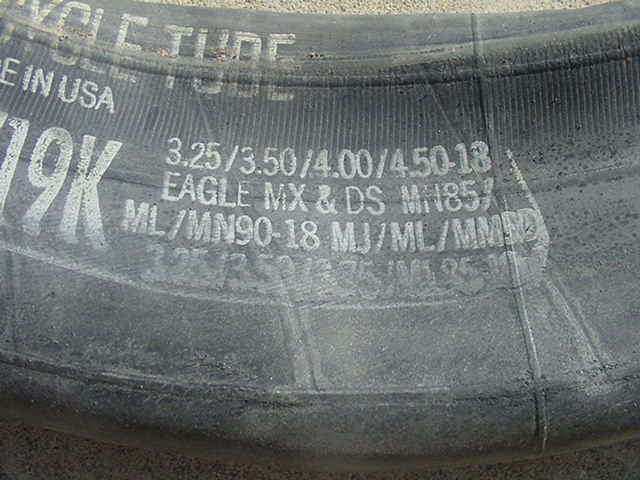
This is the tube size. First off, it is for an 18" tire, not a 19" as the tire actually is. Next, see the size will fit up to a 4.50? The tube is way too large for the tire, even though the diameter is too small. This is about as stupid as it gets. This would be fine as a temporary measure to "get home" but not to ride on for years. The tube seems to be fair quality and still pliable. A cheap Chinese tube may not have survived this long. This owner was quite lucky. How to remove dings in an alloy rimThis applies to allow rims as far back as they were used. I have had less success with steel rims. They tend to ding less and instead get a big "wow" in the rim over a larger area. The chrome easily gets damaged too. The /2 Weinmann alloy rims are very easy to take out dings. They "push" around much easier than the /5 and later rims.
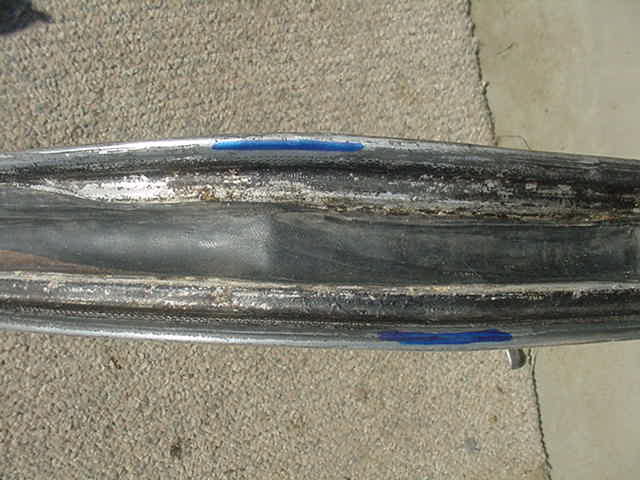
The camera sort of distorts the rim a bit, but this is to show two "dings" in the rim. Each ding is marked in blue. They are staggered a bit, showing that they happened at different times. Someone tried to fix the upper one it by hammering on the rim. Duh. Aluminum does not respond to hammering, at least not as one would like. Questions about how to repair a ding are common, so here is how to do it.
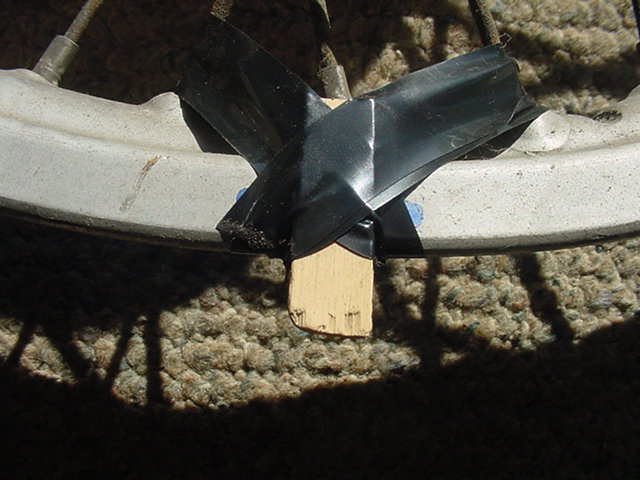
The ding can be fixed by slowly pressing on the rim in the right place. This is a small ding and it needs to be pressed in a small area. The ding is over a 3" part of the rim. I want to press on the center with a 1/2" piece of wood. I like to use a piece of hard wood to protect the rim. I tape the wood in place just because I am working by myself. The backside is protected by cloth, or better yet is to use wood. The wood will spread out the pressure on the good side.
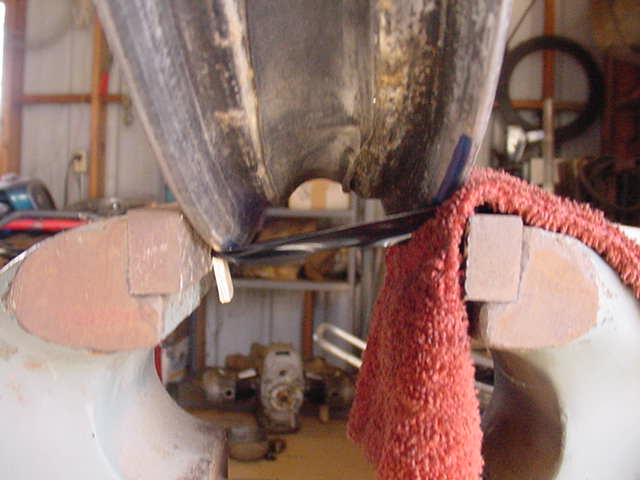
One could use a hydraulic press, but I like to keep up the pressure for hours and it could leak back. Besides, few owners have one available to them. A vise is far more common. This is a heavy duty vise, and it is needed. A small vise probably won't open far enough or have enough pressure. I like to crank it in just past where I want it to stay, but not much.
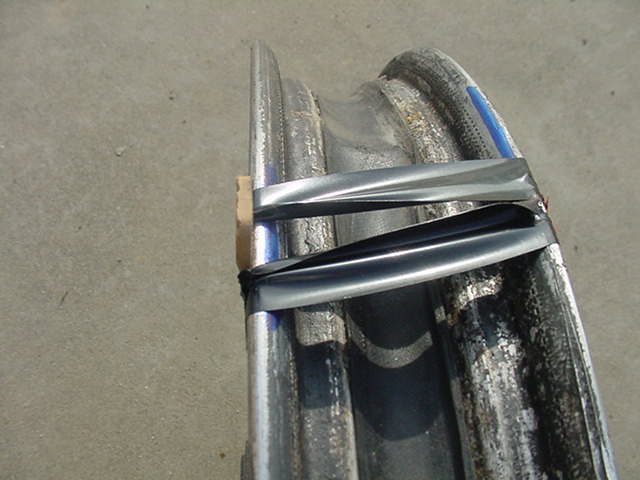
This is the next morning. It came out perfectly straight........... I was lucky to get it in one try. Now you can still see the ding on the right side and it is larger than the one was on the left side. It is now in the vise, but will take a few cranks at hourly intervals to get this one out. Tire mountingI have gotten quite a few requests for the same type of article on mounting a tire. I am too lazy to just go out and mount a tire for the pictures. I am waiting for a real need to mount a tire. |
|
This page was last edited:
04/08/2006 - copyright
Duane Ausherman |